Login/Signup

7 quick cleaning hacks that can make your life easier

Whether you love cleaning, hate it, or fall somewhere in between, these quick cleaning hacks are sure to make your life so much easier.

1. Cleaning The Toilet

When it comes to cleaning the bathroom, the toilet is probably the worst part of the job. To make it easier, pour toilet bowl cleaner into the commode, leave it sit for a few minutes, then give it a quick swish with a toilet brush. Use disinfectant wipes to wipe down the outside toilet surfaces and you’re all done!

2. Remove Floor Scuffs

Hardwood floors are beautiful, but they require a bit of work to keep them looking great. For scuff marks, use a sock or tennis ball to buff the mark away. If that doesn’t work, add a small bit of baking soda and buff again. Wipe any residue away with a damp cloth.

3. Freshen The Garbage Disposal

Garbage disposals are great and all, but they can get rather stinky if not cleaned properly. To freshen your garbage disposal in a hurry, cut up a lime or lemon and run it through the disposal. The citric acid will clean and disinfect the inside of the unit and leave it smelling lemony fresh.

4. Dusting The Blinds

If you haven’t dusted your blinds in a while, this hack won’t work to remove the thick layer of sticky dust that’s sure to have accumulated. However, if there isn’t much dust on your blinds, close the blinds and use a microfiber cloth in a side-to-side motion to remove dust. Turn the blinds the other direction and do it again.

5. Deodorize Your Home

There’s no need to buy expensive deodorizer products from the store to get out stubborn smells in your home. All you need is a box of baking soda and a vacuum. Sprinkle a thin layer of baking soda on carpets, rugs, pet beds, and other soft surfaces. Let it sit for a few minutes and then vacuum. It’s really that simple and cheap to remove stale odors from your home.

6. Clean The Microwave

If the walls of your microwave hold more food than what you actually heat in it, this hack is for you. Cut up a lemon, add it, and a couple of teaspoons of white vinegar to a cup of water, and microwave the concoction until you see steam form on the window. Turn the microwave off, leave the door shut, and allow the steam to continue permeating the inside of the unit. After a few minutes, remove the cup and wipe the walls of the microwave clean with a damp cloth.

7. Shine Stainless Steel Appliances

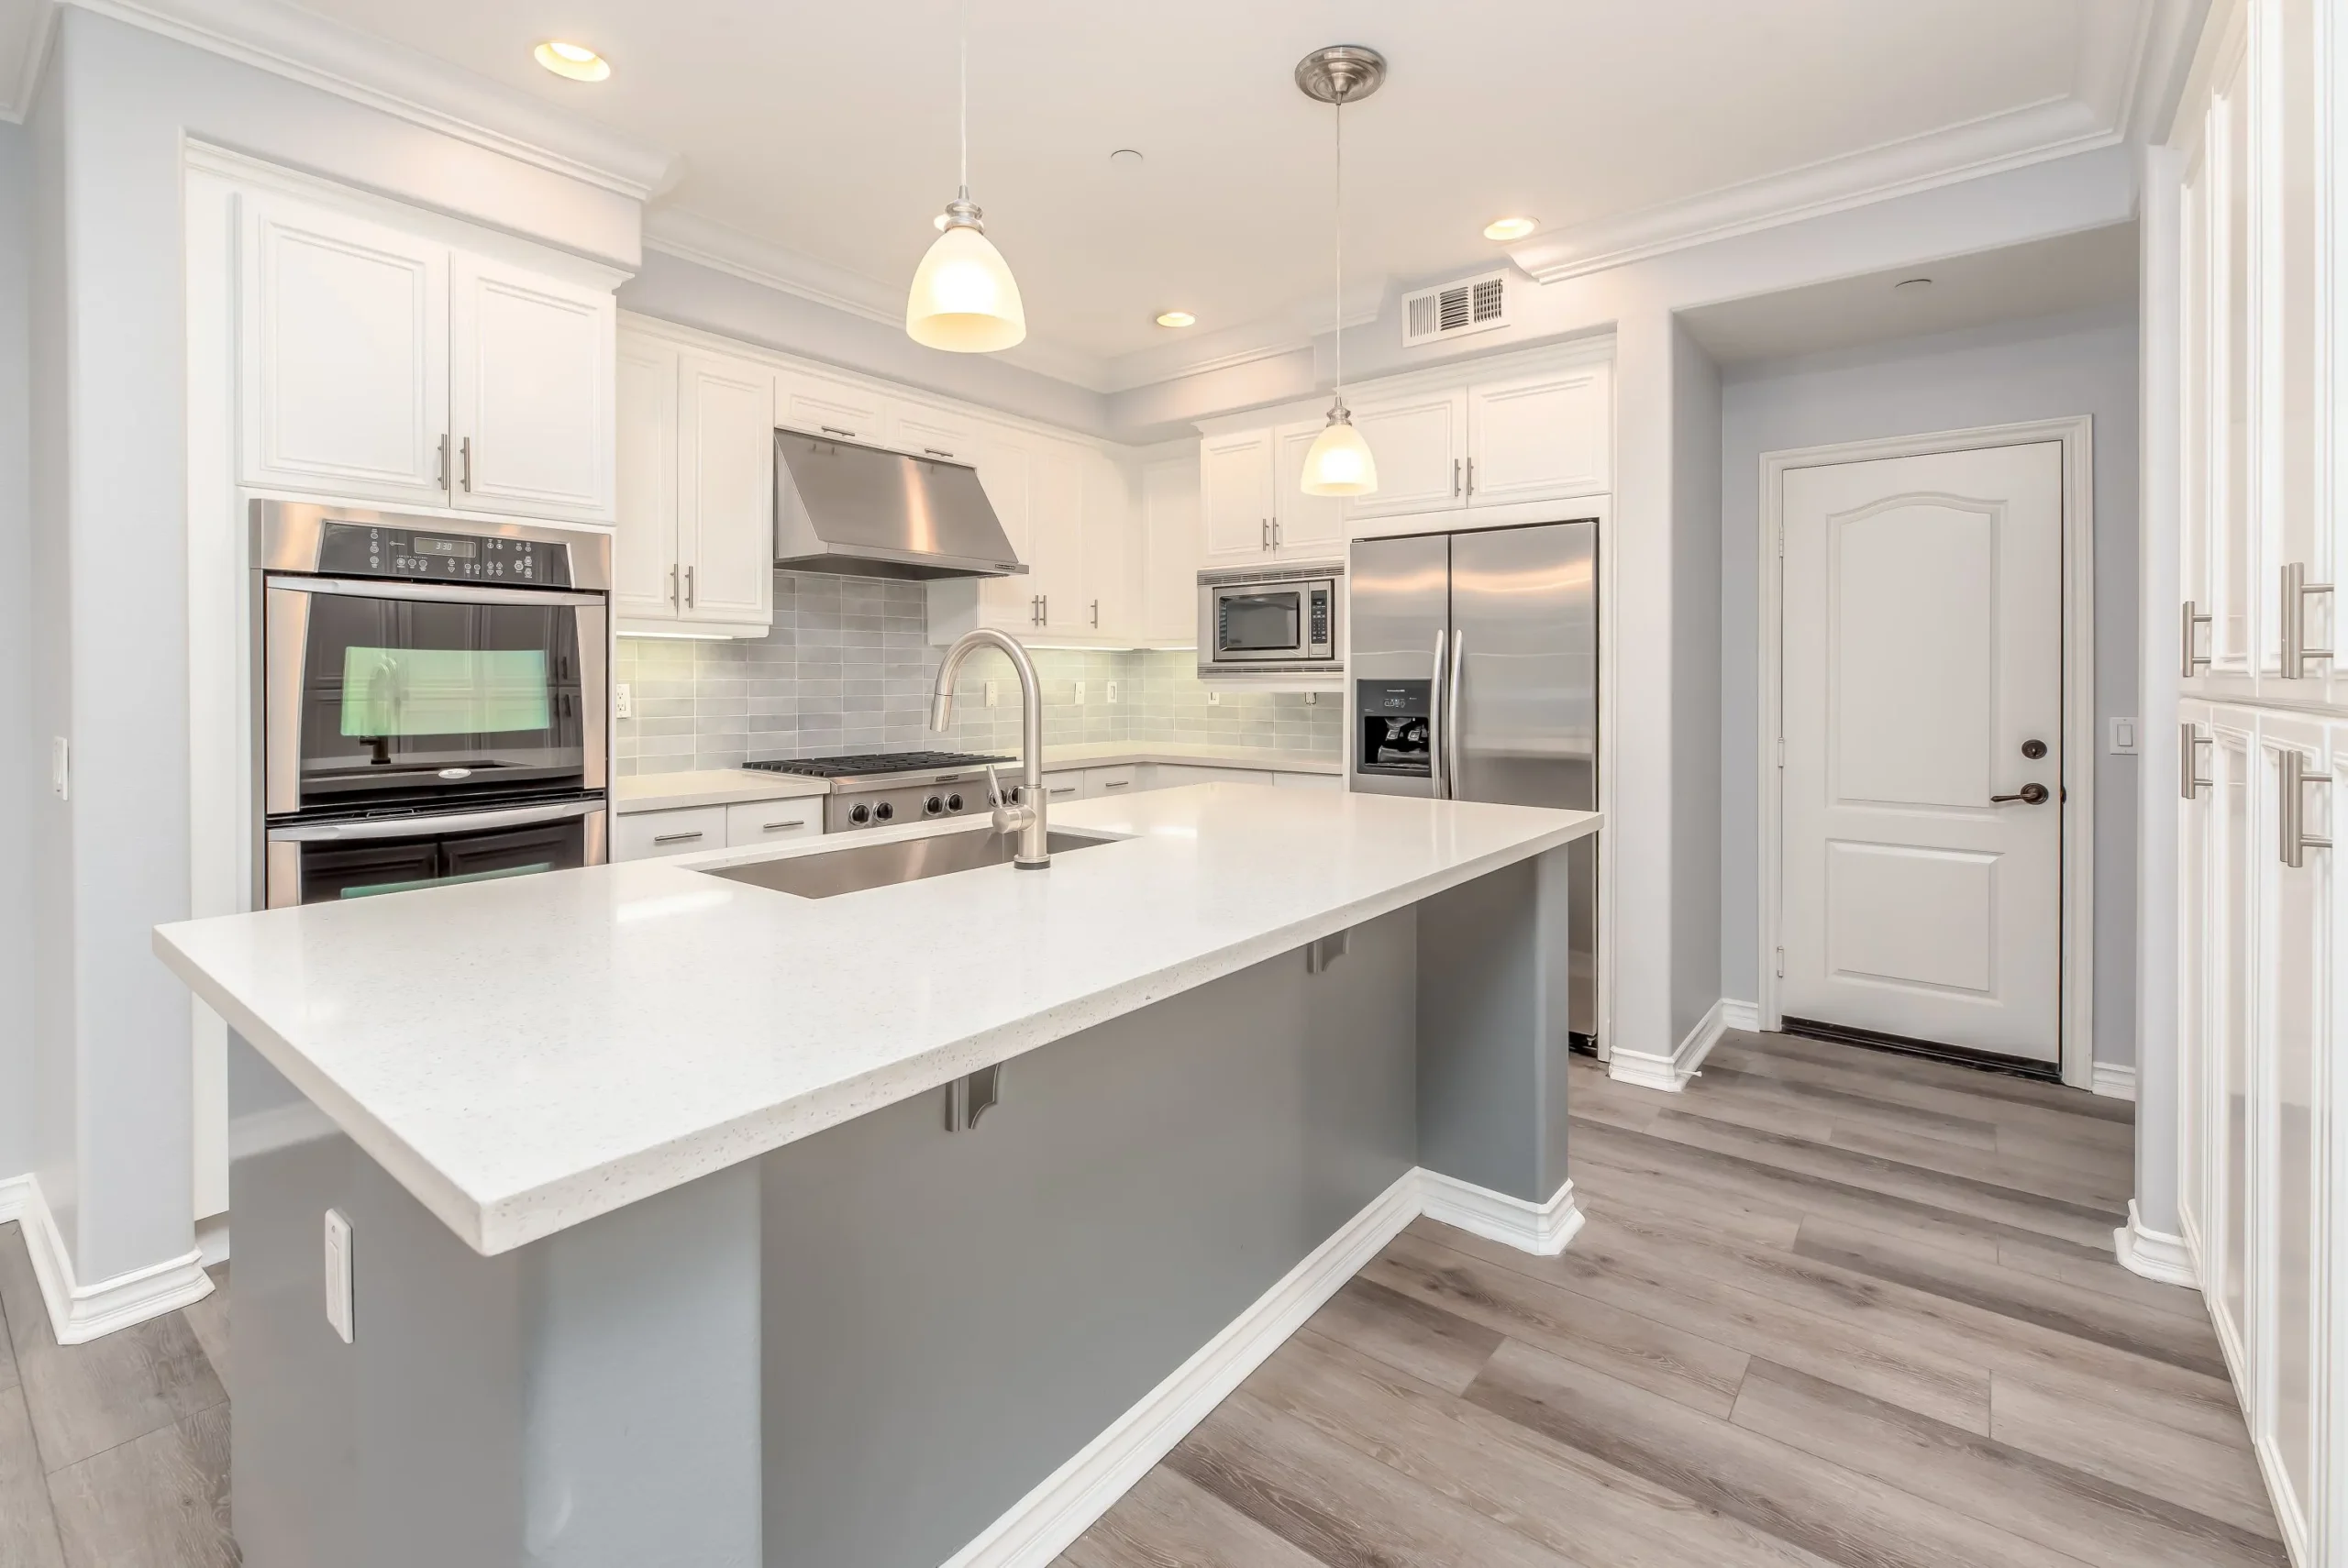
Stainless steel appliances add a sleek, modern look to any kitchen, but when they’re covered in fingerprints, they can be quite the eyesore. Remove those prints and make your appliances shine again by using a soft cloth and some olive or coconut oil. Just be careful not to use too much of either oil as it will leave behind a sticky, oily mess.

4 Easy DIYs To Spruce Up Your Kitchen

The kitchen is often the most used room in the house, which means it’s likely the most visible, too. As such, even the smallest changes can have a big impact. If you’re looking for ways to give your kitchen an upgrade without spending a great deal of time or money, check out these cheap and easy kitchen DIYs below for inspiration.

1. Replace The Faucet

One of the easiest upgrades that make a dramatic statement in your kitchen is to replace the faucet with something sculptural-looking and high-tech. The upgrade will make your kitchen seem more high-end almost instantly. To complete this DIY, simply turn the water off underneath the sink and detach the hot and cold hoses from the old faucet. Remove the old faucet and follow the manufacturer’s instructions for installing the new faucet. Once everything is in place and tight, turn the water back on and check for leaks.

2. Redo The Backsplash

A backsplash redo is easy to do and can change the look of the room without changing anything else. A modern choice in kitchen backsplashes is self-adhesive metal tiles. Just cut the tiles to the correct size and shape for the space, then apply them using the pre-applied adhesive on the back.

3. Update The Lighting

One of the most dramatic and effective changes you can make in any room is to update the lighting. Add some under-the-counter LED lighting using double-sided tape or small screws – if you can hang a picture on the wall, you can do this – or change out your old light bulbs for smart bulbs you can control with your phone. This will allow you to change the ambiance in the room to suit the mood with just a touch.

4. Replace The Drawer And Cabinet Pulls

One of the most cost-effective changes you can make in your kitchen to make a big impact is to replace the old drawer and cabinet pulls with new ones. It’s as simple as unscrewing the old hardware and turning in the new ones, so there’s really no excuse not to make this upgrade, especially when most hardware and home improvement stores carry a wide selection of handles and knobs to fit any budget. If you’d like to give your kitchen an updated look without spending a great deal of time or money, try one or all the ideas mentioned above.

Creative Ways To Expand Your Closet Storage Space

Even if you have enough living space in your home or apartment, having enough closet space is another thing entirely. If you’re like most people, there’s never enough closet space to accommodate all the things you want to store. From clothing to shoes and everything in between, closet space is valuable and often not enough in many households.
If this sounds familiar, don’t panic. You don’t have to begin knocking down walls to make bigger closets. Below are several creative ways to expand your closet storage space cheaply and easily.

Bookcases Aren’t Just For Books

If you’ve never thought a bookcase was good for anything but holding books, think again. Bookcases are great for holding all sorts of things, and they work especially well in the closet for holding bins, baskets, and more. You can find used bookcases at thrift stores, or you can opt to build your own. Either way, try to find ones with deep shelving that will accommodate almost anything you want to put on them. If you need lots of added space, add more than one bookcase to your closet, and be sure to anchor them to the wall for safety sake. An alternative to bookcases in the closet is using small dressers instead. Dressers designed for use in a nursery or kid’s room are the perfect size for a small closet.

All Closet Space Is Valuable

The space inside your closet isn’t the only space usable for storage. Consider using the back of the door for storage, too. Add coat hooks or a towel bar to the door for hanging things like robes or necklaces. If permanently adhering hardware to the door isn’t an option, use over-the-door options instead. An over-the-door shoe organizer works great for things like socks, underwear, shoes, and other small items that can be separated and organized. Check stores like Ikea for other over-the-door storage solutions.

The Top Shelf Is Your Friend

It might be difficult to reach, but the top shelf in your closet is perfect for items you don’t use that often. Put it to good use for seasonal items like beach towels, winter hats and gloves, boots, and sports gear you only need periodically. Use boxes or bins to keep things organized, and don’t store any heavy object up there for obvious safety reasons. Label the outside of each box so you know exactly what’s inside at a glance.

Rethink The Way You Hang Your Clothes

Most people hang their clothes on good old-fashioned hangers. Wire hangers take up less space, but many people prefer sturdier plastic or wooden hangers that take up lots of space on a closet clothing rod. You can double – or even triple – the space you have to hang clothes by switching to the Wonder Hanger. This As-Seen-On-TV invention allows you to hang several articles of clothing on a specially designed slotted bar that folds down to save space.

Think Outside The Closet

No one says that closet storage has to stay inside the closet. You can expand the closet storage space you have by going beyond the closet itself. Use your imagination and repurpose old furniture pieces to work as storage anywhere you need it. Look for an antique armoire for the bedroom, or maybe a rolling storage cart for the bathroom or kitchen. Underneath the bed is a great place to store seasonal clothing, too. Just purchase the appropriately sized bins to place them in so they stay clean and fresh until you need them again. For many people, the closet space they have just never seems to be enough. Whether you own a home or rent an apartment, you can use the creative ways to expand your closet storage space above to get the most out of the closet space you already have.

7 Tips For Making The Most Of Your Limited Kitchen Space

Rental apartments aren’t known for having large, spacious kitchens. In fact, they usually have barely enough counter space to prepare a sandwich on. If your rental kitchen is on the small side, the following tips will help you transform that limited space into something reminiscent of a well-designed, functional kitchen.

1. Get Rid Of Stuff You Don’t Use

As you pack up to move into your new apartment, get rid of all the kitchen appliances and gadgets you don’t use. For example, when’s the last time you used that panini maker? Or what about that espresso machine? If you haven’t used it in a year or two, donate it to the thrift store. Doing so will free up valuable real estate in your new but tiny kitchen.

2. Store Things Vertically

In a small kitchen, every inch of space is valuable, so get creative and store things vertically. The walls in your kitchen hold lots of storage potential if you use your imagination. Things like magnetic knife strips, hanging pot racks, dish-drying racks installed above the sink, and hooks for hanging aprons, potholders, and small tools all help you make the most of your limited space in a small kitchen.

3. Decorate With Everyday Items

It just makes sense to leave things you use every day out for easy access. For instance, brooms, dish brushes, and soap dispensers can all be used to “decorate” in a small kitchen. Look for a wooden broom, glass soap dispenser, or a natural fiber dish brush to soften the look of your kitchen while still getting the job done.

4. Light It Up!

Good lighting can make even the smallest of spaces seem bigger and brighter. Invest in new light bulbs that provide plenty of cool light that’ll wake you up in the morning and get you going.

How To Choose The Perfect White Color

White is white is white, right? Wrong! There are so many shades of white, it can be hard choosing the right one for any given project. Is it a cool white or a warm one? What vibe are you going for? A stark existence or a welcoming hue? The color white, although simple in theory, is actually quite complex and it can be difficult choosing the right shade. Below, we give you some pointers to help you choose the perfect shade of white for your painting project.

Cool Or Warm White?

White comes with both cool and warm undertones. Cool whites include gray or blue undertones that lend a soft touch to the color. These undertones can soften harsh lighting and create a fresh vibe in the space. Many home improvement projects look great with a cool white rather than a warm one. Warm whites, on the other hand, have yellow, pink, or peach undertones that give off a warm, inviting feel. Warm whites are best suited for rooms that don’t receive a lot of natural lighting as they lend a sunny vibe to the room. When you’re searching for the right shade of white for your project, it’s a good idea to get samples of both cool and warm whites so you can determine which is best suited for your space.

Don’t Buy Before You Try!

It’s a bad idea to commit to a white before you’ve had a chance to see it in action in your home. Grab a few samples or paint cards to take home and really give each color a fair chance to show its beauty in all different kinds of light. You may be surprised to find out that the white you thought you liked really isn’t the right choice after all. Finally, invite a few friends or family over to give their opinions on your samples. Fresh eyes can give a new perspective, so get a few opinions from other people to determine the right shade of white for your project. There are literally thousands of shades of white to choose from, so don’t choose blindly. Go through the process and make sure to sample both cool and warm whites to eliminate an entire group of hues from your search. Don’t get intimidated by your options. It’s only white, after all. The right shade will present itself in a quick hurry if you follow the tips above.         Value Plus 3% Real Estate INC | Value Plus 3% Real Estate INC info@vp3.ca | (250) 308-1888 #realty #homes #property #home #house #householdtips #houses #tips #organizing #organize

How to Prevent Humidity in Your Basement

? Humidity in a basement is a problem for many reasons. ? If you’d like to find out how to prevent humidity in your basement, this article is for you! Humidity in a basement is a problem for many reasons. Not only is the space smelly and uncomfortable, but it can also cause structural issues and health concerns, as well. There are several causes of dampness in a basement. From temperature changes and the presence of groundwater to excess rain and/or moisture inside the house, damp basements are a common issue for many homeowners. The good news is, there are a number of ways you can prevent humidity in your basement. The trick is to be proactive in finding the source of the moisture and then eliminating it. Below, we give you several things you can do to get rid of and prevent humidity from being a problem in your own basement.

Get Rid Of Dampness Inside Your Home

Moisture and leaks from inside your home can cause humidity to form in your basement. If you know of any leaky pipes in your home’s plumbing, make sure to get them fixed right away. Additionally, you should turn off humidifiers, make sure your clothes dryer is vented outside properly, install and use exhaust fans in the bathrooms and kitchen, and during humid months, run a dehumidifier on each level of your home to remove as much moisture as possible from the air.

Eliminate Outdoor Moisture Sources

Basements are humid enough without additional moisture coming in from the outside. Do your best to control these sources by cleaning out your gutters at least once a year. This will keep rain and runoff flowing away from your home, so it doesn’t spill over right next to the foundation and leak into your basement. Also, it’s important to make sure your sump pump is functioning properly at all times. This is a vital piece of equipment that cannot fail, for if it does, it could mean thousands of dollars in damage. Lastly, make sure your basement is as watertight as possible by covering the dirt floor with a plastic sealant, filling in any cracks in the foundation, and covering the walls with waterproof paint.

Prevent Condensation

Temperature changes occur in the basement quite regularly. This causes condensation to build up, making the space more humid. You can prevent condensation from occurring by increasing ventilation in the room. Open your basement windows on dry days to increase the airflow to help dry things out. Be sure to close the windows each evening and during humid/rainy weather, though, to prevent excess dampness. Lastly, insulate exterior walls and cold-water pipes to keep them warmer. Nothing is worse than a damp basement that smells funny and is uncomfortable to be in. By getting rid of moisture in and around your home, you can prevent humidity in your basement. #realty #homes #property #home #house #householdtips #houses #tips #organizing #organize

7 Interior Trending Decor Ideas

Today’s home is much more than just a place to rest and unwind. These days it’s an office, school, and whatever else it needs to be while the pandemic rages on. With the dawning of a new year comes new interior home décor trends most people will find refreshing and helpful. So, without further ado, here are a few of the interior décor trends you can expect.

1. What’s Old Is New Again

While styles come and go, it’s the nostalgia that’s playing a big role in today’s interior décor trends. Styles from the Victorian era, Art Deco, and even grand millennial aesthetics are making a comeback as many people wish longingly for what used to be in a world so full of uncertainty and strife.

2. Easy To Clean Is Always Good

We’ll be seeing lots of easy to clean fabrics and surfaces. Expect non-porous surfaces like glass and metal to be part of many home renovations as they deter the growth and spread of bacteria. Also, the kid-friendly, durable, stain-proof fabric will take center stage where applicable.

3. Warm, Cozy Colors

Earthy tones and warm neutrals will be popular as we begin making our homes cozier places to be. Today’s trend is organic shades like Camel, which adds a layer of warmth and hominess gray just doesn’t have.

4. Calming Shades Of Blue

Color has a big impact on our emotions, which is why shades of soft blue will be trending this year. The calming effect this shade has on the mind will help alleviate some of the stress we’re all feeling as we stay quarantined in our homes. Blue is a timeless color that never seems to go out of style, making it a great choice for a fresh look.

5. Natural Materials Aren’t Going Anywhere

Wood tones, organic materials, and natural accents are going to be extremely popular.

6. Say Goodbye To The Open Floor Plan

In years past, the open floor plan, where one room flows seamlessly into the next, was valued as it brought the family closer together. This realization puts open floor plans on the outs and closed floor plans at the top of many homeowner’s renovation plans.

7. A Shift Toward Sustainable Furnishings

Sustainability is a subject that impacts our daily lives in many areas. Today’s homeowner is opting less for cheap, DIY furnishings and choosing instead to buy furniture that’s more expensive and better made. These furnishings are kinder to the environment and they give their owners a sense of pride in being able to hand down an heirloom rather than throwing the piece in the landfill.

5 Easy Pantry Organizing Tips

You can make a food pantry out of anything. From a walk-in closet to a single drawer in your kitchen, a pantry holds a plethora of non-perishable foods, paper products, small appliances, and more. The problem with most pantries, regardless of size and location, is that they can get very cluttered and disorganized very quickly. With so many things inside, it’s no wonder. However, if you’ve always dreamed of having a well-organized pantry that’s not only pleasant to look at but also easy to find things in, try the tips outlined below.

1. Clean It Out

The key to achieving a successful pantry setup is to figure out what you have to work with. You can do this by cleaning the space out. Start at the ceiling and remove any cobwebs hanging in the corners and work your way down. Wipe shelving, and if you’re feeling ambitious, give them a fresh coat of paint. Finish by sweeping and mopping the floor. If you aren’t feeling particularly ambitious, simply clean the space and apply contact paper to the shelves.

2. Take Stock Of What You Have

Once you’ve cleaned out your pantry, it’s time to take stock of what you have and what you need. Throw out expired food items and start a box for donations to your local food pantry of items you won’t be using. This is also the perfect time to rearrange the items in your pantry for convenience. For example, move seldom-used items to the back or to a lower shelf to make room for the things you use most within easy reach.

3. Make It Easy To See What You Have

You can make things easier to find and create a beautiful display at the same time by switching out the mess of open boxes and bags for pretty, clear containers. For instance, baking ingredients like flour and sugar look great in clear mason jars while rice, beans, and other dry goods make for a pleasant display in tightly sealed plastic containers with lids.

4. Purchase Storage Solutions

Once you’ve decided how you’ll organize your pantry, it’s time to purchase the storage solutions you’ll need. Your list may include things like mason jars, plastic containers, baskets, wire racks, spice racks, racks for plastic wrap and aluminum foil, etc.

5. Put Your Pantry Back Together

Now that you’ve purged what you don’t need and have acquired the storage solutions that will work best for you, it’s time to put everything back together. Be sure to group like items together – sugar and flour with other baking ingredients, for example – and face canned goods forward for easy viewing. Keep arranging and rearranging until you have the pantry you’ve always dreamed of. A pantry is one of those areas in a home that’s used daily and often becomes a disorganized mess. To make it easier to find what you’re looking for and what you need to replace, follow the tips above to organize your pantry once and for all.

7 Creative Storage Hacks to Help You Hide Clutter

Clutter is a fact of life. It happens to the best of us, creeping up and becoming an issue often before we even realize it. We all have stuff and that stuff takes up a lot of space. If you’re tired of looking at it, though, the following creative storage hacks can help you get organized or at least appear to be.

1. Tidy Those Bookshelves

If you have bookshelves in your home, it’s the ideal place to store things you don’t want others to see. Take a moment to organize the contents and then install a pull-down window shade to cover the section that contains the stuff you’d like to hide. The result is elegant – almost like it’s supposed to be that way.

2. Store Chargers And Other Cables

If you’re like most people, you have a drawer or basket full of tangled cables. Attempting to pull just one from the mass is nothing less than a 15-minute act of frustration. To remedy this headache, coil each cord into its own empty toilet paper roll and then toss the rolls into a basket or drawer for safekeeping.

3. Hide Clutter In The Playroom

Kids’ playrooms are hard to keep organized. There’s so much stuff… If it seems like there isn’t enough room for everything in the playroom, try hiding what you can behind a good old-fashioned shower curtain. Install a shower curtain rod above a shelving unit and slide a coordinating shower curtain across the clutter to instantly hide it and make the room appear tidy.

4. Utilize The Space Underneath

You can declutter a room quite easily if you utilize the space underneath the furniture. For instance, under the coffee table or the bed are great places to put things. Just add a skirted tablecloth over the top and you have instant storage nobody will notice.

5. Storage In The Laundry Room

Hiding clutter in a small laundry room is challenging. The trick is to use coordinating baskets and/or bins to organize everything from dog food to trash bags. Give yourself extra space by installing shelves on the wall to hold the baskets so they aren’t taking up space on the floor.

6. Organize That Pantry

Is your pantry a crazy, disorganized mess of cans and boxes? Do you have no idea what’s expired and what’s not? Put that chaos to rest by creating a roll-out storage shelf that utilizes the space between the fridge and the wall. This handy DIY project lets you see at a glance what you have so you know what to add to your shopping list and what’s going to expire soon.

7. Under The Bed

Under the bed is prime real estate for storage. All you need to do is purchase a couple of under the bed storage bins and you’re all set. To upgrade this decluttering hack, install some wheels on the bottoms of the bins for super-easy retrieval.

Clutter happens in almost every home. Whether the stuff is necessary or not so much, clutter can be exhausting to deal with. To get rid of clutter – or make it appear like you have – try the clever storage hacks listed above.

6 Super Creative Hacks to Expand that Tiny Closet

Big closets are something many of us specifically look for when moving into a new house or apartment. After all, it makes more sense to store all that stuff rather than have to part with it because there isn’t enough room to keep it, right?

Sometimes, however, you can’t have your cake and eat it too. Small closets happen, and when they do, you have to get creative. Below, we put together some helpful hacks designed to expand those tiny closets so you can keep more of your stuff. Of course, it’s still a good idea to get rid of anything you haven’t looked at, worn, or otherwise used in the last five years.

1. Get Rid Of Some Stuff

If there isn’t room, there isn’t room, plain and simple. Before you try stuffing that tiny closet full, try paring down its inventory. That sweater you haven’t worn in forever – donate it. Those roller skates you keep meaning to put to use but never do – they’re out!

Don’t keep holding onto things you know you’ll likely never use again just because. Your space is limited, and you need to use it wisely.

2. Create Extra Hanging Space Outside The Closet If You Have Room

No one says you have to hang all your clothinginsidethe closet. If you have space outside your tiny closet, hang an extra bar or two to accommodate all the clothing you want to hang.

Alternately, many home improvement stores carry hanging racks on wheels that you simply put together and place anywhere to expand your closet space.

3. Raise Your Bed

There is a lot of valuable space underneath your bed – all you have to do is access it. If you’re not afraid of heights or are claustrophobic, you can raise your bed up high to give you a ton of extra space to put things. Furthermore, if you hang some curtains around the space, it’ll be like having an additional closet in the room.

4. Use The Inside Door Panels For Extra Hanging Space

The inside of the closet door is often overlooked as storage space, but it works great for hanging things like scarves, purses, and other items that hang flat. Simply install a couple of bars or a few hooks to utilize this handy space.

5. Store Shoes Elsewhere

If you have several pairs of shoes that take up a lot of space in your closet, try storing them somewhere else instead.

Under the bed is a great place to store your shoes. If you’re a wine drinker, don’t throw out those empty wine boxes as they make great under-the-bed storage boxes for shoes.

6. Switch Out Seasonal Clothing

Why keep seasonal clothing out all year long when you really don’t have the room for them? Keep a trunk in the bottom of your closet or at the foot of your bed to switch seasonal clothing into when you no longer need them. This will free up space in your closet, making it easier to find what you’re looking for, and the trunk can double as a seat when needed.

Small closets aren’t deal-breakers, especially if the rest of the home is perfect for you. Embrace the small space and use the hacks above to expand that tiny closet.

7 Tips And Tricks To Organize Your Home Bills

Paying bills isn’t a favorite chore for anyone, but it’s a fact of life that can’t be ignored. Not paying bills on time can lead to substantial financial penalties in some cases, so it’s important to have an organized system that enables you to pay everything on time without hassle. Use the seven tips and tricks to organize your home bills below to make this chore as easy and efficient as possible.

1. A Place for Everything, and Everything in its Place.

You’ve probably heard this saying before, but its meaning is especially true where bill paying is concerned. How can you make sure all your bills are paid on time if you don’t know where they are?

Dedicate a specific area for placing your bills as they arrive in the mailbox. Ideally, this will be the same place you actually sit down to pay the bills and balance your checkbook so you don’t have to transport anything from one spot to another. If you always place the bills in the same spot, you’ll always know where to find them when it’s time to pay them.

2. Schedule Time to pay Bills

Whether you pay bills every week, bi-weekly, or once a month, schedule a dedicated time to do so. When you set aside a specific time/date to pay your bills, you can plan accordingly so that nothing else interferes and your focus is on the task at hand. Do your best to stick to your schedule so you can get the job done and not have to worry about whether a bill is past-due or not.

3. Open Each and Every Bill

Many people think if they don’t open a bill, they won’t have to face the potential bad news inside. But what if the news is good? Maybe you over-paid a doctor bill, and they’re sending you a refund check. Not opening every piece of mail that comes to your mailbox or email could mean you miss something important. Having piles of unopened bills (even if you’re behind on them and have several copies of each) does not depict an organized bill-paying system.

4. Sort your Bills by Date

Sort all your bills by their due date. This way, you’re more apt to pay the ones due the soonest first. As soon as you get a bill in the mail, open it up and place it in the appropriate slot according to the date it is due. When it’s time to sit down and make out bills, you’ll know at a glance, which ones have to go out first.

5. Don’t Forget about Online Bills

Many people prefer to pay some or all of their bills online. In fact, some people even have certain bill payments automatically withdrawn from their bank accounts so they don’t have to worry about them. While technology definitely makes things easier when it comes to bill paying, you must be even more vigilant with bill management if you pay your bills online. During your weekly/monthly bill pay sessions, it’s important to:
  • Ensure you have enough money in your account to pay your online bills
  • Check for emails with important information concerning your online bills, and
  • Write down any confirmation numbers you receive when you pay your bills online in case there’s any discrepancies with the payments.

6. Organize your Bills after Paying Them

You might be tempted to throw away paid bills, but it’s important you hang on to them in case you need to reference them again in the future. File the paid bills and receipts away in a filing cabinet, keeping like bills together and in order.

7. Clear out Old Bills

Once a year, go through your file cabinet and get rid of all the old bills from the year before. This helps keep the accumulation of papers to a minimum and makes room for the next year’s paid bills. Be sure to shred anything that contains personal information before disposing of it.

6 Must Have Items To Clean Your Home

Not everyone loves cleaning the house but having a handy cleaning kit can make the job easier.

The list below outlines six of the most important items you need in your cleaning kit to get great results every time you clean.

1. All-Purpose Cleaner

If you only have one cleaning product in your cleaning kit, make sure it’s an all-purpose cleaner. The name says it all.
All-purpose cleaners work great on a variety of surfaces, so you can take them room to room to tackle a wide range of jobs. They work especially well in the kitchen and bathroom as they often contain germ-fighting ingredients that sanitize surfaces as they clean.

2. Glass Cleaner

Shiny surfaces such as windows, mirrors, shower doors, and faucets require a special kind of clean – one that doesn’t leave streaks. Glass cleaner is the perfect product for these surfaces as it leaves behind a shiny finish. Be sure you choose a good brand of glass cleaner, though, as cheaper brands tend to leave streaks behind.

3. Furniture Polish

Dusting is a dirty job, but someone has to do it. Make sure your home cleaning kit contains furniture polish and a soft dusting cloth so you can clean all your furnishings quickly and easily. Don’t forget to dust your wooden furniture, any shelving in the room, and all of the end tables to really make the space feel clean and fresh.

4. Rubber Gloves

Household cleaners are full of nasty things that can, at the very least, dry out your skin. At worst, they can cause allergic reactions or illness. It’s always a good idea to wear rubber gloves when working with any cleaning solutions. Besides protecting your hands from harsh chemicals, the gloves will also keep all that dirt, grime, and who-knows-what-else from coming into contact with your skin.

5. Paper Towel

Paper towel comes in handy for a lot of different cleaning jobs, but it is especially useful when cleaning glass surfaces. Paper towel not only dries the surface as you wipe, but it also removes any smears and/or streaks as well. An alternative to using paper towel if you’re an avid newspaper reader is crumpled-up newspaper.
Newspaper works as well as, if not better than, paper towel to clean windows and mirrors, so be sure to repurpose your papers after reading them for a greener alternative.

6. Cleaning Wipes

Often considered a shortcut, cleaning wipes are nice when you don’t have a lot of time to do a deep-down clean. Since most contain anti-bacterial ingredients, they work well in bathrooms and kitchens for wiping down surfaces quickly. Keep a container of cleaning wipes handy in your kit and do a quick swipe when unexpected guests are knocking at your door.

Cleaning the house can be an arduous chore. With the right cleaning supplies, however, it is much easier and faster. Put together a home cleaning kit for your house that includes the six important items listed above for a convenient way to get the job done.

5 Basic Ideas of Modern Home Decor

If we had to choose one word to describe modern home décor, it’s “simple.” Modern décor features clean lines, a neutral palette, and geometric shapes, which may sound boring, but it’s really anything but. Modern home décor is warm, inviting, and stylish in any home, so if you want to upgrade yours with a modern twist, here are several design elements you’ll need to include.

1.Simplicity

Now, we’re not talking four bare walls and a chair here, but modern home décor is simple and minimalistic. Studies have shown that clutter can lead to stress, which is something modern home décor does not contribute to.

As you go about redecorating, remember that less is more and try to keep things as clutter-free as possible.

2. Functionality

Functionality is important in modern home décor. In addition to the clean lines and clutter-free spaces, you also want to make sure your room(s) are easily identifiable as to their use and that their various features and elements are easily accessible.

For example, a modern kitchen will have plenty of workspaces, and all its equipment and tools will be readily available.

3. Technology

What is modern décor without technology? Technology is a huge part of everyday life, so it makes sense that it should be part of your modern home décor. It’s not enough to just say “technology,” though, but rather, technology that is streamlined (think flat-panel TVs and built-in computers) to keep those clean lines modern home décor is all about.

4. Open Space

This design element may not be possible in some homes, but modern home décor has an open and airy vibe. Large, open rooms with light color palettes and plenty of natural lighting work to create that feeling of freedom and openness that modern home décor is known for.

Even if your home has small, enclosed rooms, you can create that feeling of openness by using light, neutral colors and keeping windows uncovered to allow as much natural light to flood the space as possible. You can also hang mirrors on the wall to reflect the light, which will add depth to the room and make it appear larger than it actually is.

5. Character

Although modern home décor’s main focus is neutral, there’s no reason not to explore your wild side by adding a pop of color here and there for character. An accent wall painted a nice red or throw pillows in a bright yellow can add just the right amount of fun to an otherwise neutral palette for an exciting touch.

Creating modern home décor isn’t difficult, and you have a lot of room for creativity and personality. All you need to do is remember these five design elements and you’ll be able to achieve the modern décor you want in your own home.

Refresh the Look and Feel of Your Home with These Bright Ideas

Home is a lot of things for most people these days. From being the place you rest and relax to it being your workspace and much more, the home front can get a bit stale after spending so much time there.

If it’s time to give your home a fresh look and feel, try these simple, yet effective, ways to brighten, freshen and revitalize the ambiance of your home.

Take Advantage Of Natural Lighting Sources

Natural lighting not only makes your home look and feel better, but it also has the ability to make you feel better, too. Instead of turning on the lights when you get up in the morning, throw open the shades and let the sunshine in.

Not many windows in the room? No worries. Try hanging a mirror or two opposite a window to reflect light. In addition to brightening the space, mirrors also make a room appear larger.

Consider Light Colored Furniture

Light-colored furniture looks fresh and clean, giving your space an instant pick-me-up. Try choosing furnishings in whites, light grays, and beiges, to brighten any room.

Not sure you want to commit to white furniture? Try putting light-colored slipcovers on instead. You’ll get the same effect and be able to remove them to wash them if need be.

Let Nature Inspire You

Think wicker, cotton, woven materials, etc. for décor and accent pieces to give your home the freshness of nature.

In your living room, for example, switch out heavy, dark-colored blankets for lightweight, colorful throws and remove any dark accent pieces and replace them with woven baskets and colorful pieces instead.

Bring The Outdoors In

One of the best ways to freshen your space – literally – is adding potted plants and flowers. The addition will add a fresh, clean vibe and instill the air with extra oxygen, which is always a good thing.

If you are cursed with a black thumb, you can add faux plants around your home to get the same green vibe without all the hassle of keeping the plants alive.

Whatever reason you have for wanting to give your home a fresh look and feel, the ideas above are perfect for the task. From flooding your space with natural light to adding lots of green plants and colorful flowers, you can transform your home into a bright and breezy space with just a few easy changes.

Sustainable House Cleaning Tips

The market shelves are full of all kinds of household cleaners. Designed to kill germs, remove stains, and leave a fresh scent behind, most of these cleaners are harmful to the environment. That’s because they contain harsh chemicals and toxins that leach into the soil and kill insects, sterilize animals, and poison plants.

So, what’s a person to do when they want a clean house but don’t want it at the planet’s expense?

The good news is there are sustainable ways to clean your house, and we’ve listed some of them below.

Eco-friendly Ceiling Fan Cleaning

The ceiling fan collects an exorbitant amount of dust on top of its blades. This dust goes everywhere every time you turn the fan on. Dusting the blades regularly will help keep the dust to a minimum.

Start by placing an old pillowcase over one of the blades. As you pull the pillowcase down the length of the blade, brush it over the top to pull dust inside. This will keep the dust from contaminating the air. Avoid using commercial dusting sprays as they release harmful fumes into the environment.

Cleaning Windows The Green Way

Nobody likes doing windows, but this is one of the easiest chores to do sustainably.

Get yourself some old newspapers to use in place of paper towels. Next, mix two-parts water and one-part white vinegar in a spray bottle to use as a window cleaner. Lastly, spray the window with the solution and use a few sheets of newspaper to wipe it clean.

Once you try this sustainable cleaning hack, you’ll wonder how you lived without it before because your windows will be sparkling!

Gently Remove Water Rings From Wood Furniture

There’s nothing quite as irritating as someone not using a coaster and leaving water rings on your coffee table. You can remove these unsightly stains quickly and easily using this eco-friendly cleaning hack.

Mix one-part baking soda and one-part water to form a paste. Gently rub the stain with the paste until it disappears.

Cleans Stains From Furniture

Leather furniture can be a challenge to clean as the fabric is delicate and cannot be scrubbed. To effectively remove stains from leather furniture, mix white vinegar and water in a spray bottle and use a soft cloth to buff the stain away.

For fabric furnishings, remove stains the green way by mixing a solution of washing soap, water, and vinegar and using a soft brush or sponge to coax the stain out of the fibers. Avoid aggressive scrubbing as it can damage the fabric and leave behind a noticeable patch.

Eco-friendly Carpet Deodorizer

Leave vacuuming for last, as all the cleaning you’ve done thus far has likely released dust into the air that has settled on the floor. Before you vacuum, however, sprinkle a light dusting of baking soda over the carpet and let it sit for 10 minutes or so to eliminate unpleasant odors within the fibers. Finally, vacuum the carpet to enjoy a dust-free, freshened atmosphere.

The sustainable cleaning tips above are a great start to creating an eco-friendly environment in your home. For more green cleaning tips, do a Google search to reveal a multitude of sustainable household cleaning hacks.

How To Keep Your Bathtub Clean

No one really likes cleaning their bathtub. The chore is backbreaking at best. That said, you can’t put off giving your bathtub a thorough scrubbing forever, but you can make the job easier by conducting some super easy maintenance cleaning. This maintenance cleaning is so easy, we hesitate to call it actual cleaning, but trust us when we tell you that if you do it, you’ll have a sparkling clean bathtub with little to no effort at all.

Rinse The Tub After Each Use

When you’re done taking a shower or giving the kids a bath, take a few seconds to rinse down the entire bathtub and the tub surround. This simple act will get rid of a lot of the soap scum that builds up between cleanings.

When you’re done rinsing off, let the water run for 30 seconds or so to wash down any soap residue and hair that’s left behind. When the last child has finished bathing, turn the shower on for a few seconds and let the water run until no soap bubbles or hair remain.

Spray The Bathtub A Couple Times A Week

Most supermarkets carry sprays designed to clean bathtubs and showers between deep cleanings, but these products can be expensive. You can make your own shower spray simply by purchasing a cheap spray bottle and filling it with distilled white vinegar.

Vinegar is a natural cleaner with anti-bacterial properties, which makes it a great choice for a bathtub cleaning spray. Once or twice a week, after showering and rinsing the tub, spray a thin layer of vinegar over everything including the shower curtain. The vinegar will loosen and remove any soap deposits that remain and kill any germs lingering behind. If you’re worried about the smell, don’t. Once the vinegar dries, the smell dissipates, leaving behind a fresh, clean scent.

Use A Long-handled Scrub Brush

If the nooks and crannies in your bathtub have a tendency to attract excess soap scum and/or gunk, use a long-handled scrub brush after spraying the area down with vinegar to loosen it up so it can be rinsed away. Regular scrubbing like this will keep you from having to spend time on your knees scrubbing as if your life depended on it when you give the tub a thorough cleaning.

Cleaning the bathtub is a chore no one really likes to do, but it’s something that has to be done. If you follow the tips above, cleaning your bathtub will be easier than ever and you’ll always have a sparkling clean bathtub.

YOU DREAM IT, WE FIND IT

YOUR DREAM HOME DELIVERED DIRECTLY TO YOUR INBOX

We work to ensure your buying experience is tailored to your needs. From first time buyers to seasoned investors, our diverse and experienced team will help you navigate the process and find your dream home.

Inquire about organize

Fill in your details and we’ll get back to you in no time.

"*" indicates required fields

Hidden
This field is for validation purposes and should be left unchanged.